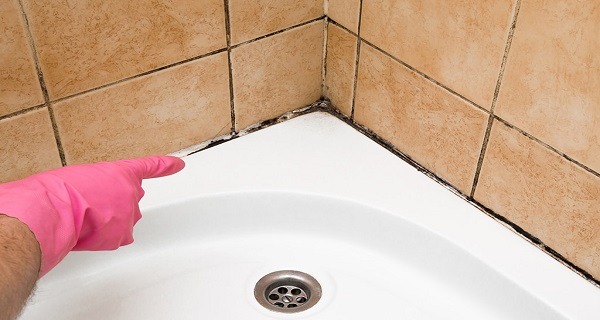
Trying to clean moldy caulk? Check out these easy tips on how to remove mold from caulk. It works great to remove mold from shower caulk. If you have shower caulk mold check this out!
A few years ago we redid the tile in our master bathroom shower. At first, it looked great, but after some time the caulk has started to get some mold on it.
I didn’t really feel like removing all the caulk so instead, I decided to go through and clean the moldy caulk.
It’s a pretty easy process to remove mold from your shower caulk. It just takes a few things you probably already have around the house and about an hour of your time.
If you want to get rid of the mold check out this easy tip on how to remove mold from the caulk.
How To Remove Mold From Caulk
To remove the mold in the caulk in the shower you will need a few things listed below. You probably already have them at home.
Ingredients Needed:
- power brush or old toothbrush
- disposable cup
- baking soda
- bleach –
If you don’t have a disposable cup you can also use a cup that you can throw out after you are done. You probably don’t want to use a cup after the bleach mix has set in it.
Note: You also may want rubber gloves to wear on your hands and a face mask to help with smells depending on how bleach affects you.
You will also need about an hour to let the bleach mix set up on the mold.
Mixing Up the Bleach Gel
Step 1: Mix about 1/2 cup of bleach with about a cup of baking soda in a disposable cup.
You may want to do just a little at a time for each. The amounts you will need will vary based on what kind of bleach you use.
Step 2: Stir until you get it to the consistency of toothpaste so it will stick to the moldy caulk.
Applying the Cleaner To Moldy Caulk
Step 3: Once you have it mixed to a thick paste then use the old toothbrush to apply it to the caulk that is moldy (You will probably want to spot test in on a small area first to make sure it doesn’t damage the tile).
Make sure it is thick enough to fully coat the caulk.
Step 4: Set a timer for about 30 minutes and then just let it sit.
It smells really strong so you may want to turn on a vent in the bathroom or open a window to help with the fumes.
Step 5: After 30 minutes check on the bleach mixture and make sure that it is still fully covering the caulk.
Step 6: Add some more bleach mixture to the caulk if needed. Then set a timer for about another 30 minutes.
Free Weekly Cleaning Printable
Clean your home in under 30 minutes a day with this free Weekly Cleaning printable!
Removing the Bleach Mix
Step 7: Once the bleach mix has set over an hour then you can use the toothbrush to scrub the caulk for a minute or two.
Step 8: Then use warm water to wash away the bleach mixture.
Make sure you rinse all of the bleach mixture off of the caulk and fully washed down the drain. You don’t want to leave chemicals where you shower.
If you still see some mold on the caulk you can repeat the steps a second time to get rid of everything.
You can see how just one time of using this bleach mixture made a huge difference on my shower.
Preventing Black Mold & Mildew In the Shower
I get asked all the time what you can do to prevent the black mold or mildew from growing on the caulk.
One simple thing you can do is help prevent the moisture in the shower. When you finish in the shower leave the door or curtain open for a few minutes and run the bathroom fan.
This will help the moisture evaporate quickly to prevent mold.
Another easy tip is you can spray down the shower with a little bit of vinegar. This will help prevent mildew from building up on the shower caulk.
Unfortunately, vinegar doesn’t work as well as bleach on black mold.
Another great way to keep the mold from growing on the shower caulk is by using a daily shower spray. You can see how to make your own here. This will help slow the mold growth.
With just these few easy steps on how to remove mold from caulk, you can get the moldy caulk looking like new again. Not only will the bleach mix remove mold spores but it also can remove some stains from caulk.
